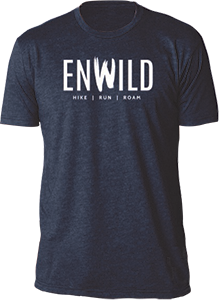
Boot Lacing Techniques for a Better Fit

Closeup of bootlaces

Given how much we hike, run and roam, many of us dream about the perfect-fitting hiking boot or running shoe. One of the problems in achieving that goal is that our feet have unique shapes and volumes. These factors not only vary between people – one person can have variation between their right and left foot.

That means even the best footwear can leave you wanting some fine-tuning. Luckily, there are a number of lacing techniques that can improve the fit of your shoe or boot.

Understanding Your Feet

Given the variation in foot shape and volume, you need to keep some things in mind when you consider lacing techniques.

  • Do you have low- or high-volume feet, and do they differ?
  • How are your arches structured?
  • Are your feet equal in length?

We aren’t often forced to answer these questions in our daily lives. Everyday footwear is usually forgiving and, for most of us, our normal daily activity doesn’t include hiking 10 miles over rough terrain carrying heavy weight. However, these factors become very important when choosing footwear for situations in which your feet will be experiencing extreme stress and pressure, such as hiking and running.

High-volume feet often need room. Undersized boots compress them, which causes decreased circulation and discomfort. Low-volume feet are the opposite:  they slide around inside an oversized boot, resulting in uncomfortable rubbing and blisters.

People with high arches usually find arch support comfortable, whereas people with mid- or low arches experience strong arch support as a painful stab in the bottom of their foot.

If your feet are different in length, you’ll want to buy a size based on the larger foot.

Understanding the shape and characteristics of your feet will help you determine which inserts and lacing techniques are right for you. For example, if you have a lower volume foot or a low arch, you would benefit from snug fit and support. If, on the other hand, you have a high-volume foot or a high arch, those same techniques could apply too much pressure, resulting in discomfort and restricted circulation.

insoles

For boots with basic, non-structured insoles, one way to get a better fit is to replace them with a more advanced insole. Insoles designed for low-volume feet provide a better fit by taking up some of the extra space in a boot, which can reduce rubbing. Insoles with structured arches provide support for feet with high arches.

Locking the Lace

Often called a double overhand knot, you can use this technique to customize sections of your boot’s lacing. For example, you can use this technique to lace some sections of your shoe tightly while leaving other areas loose. 

  • Lace your boots as you normally would
  • Stop when you reach the section of laving that you want to lock
  • Cross the laces over
  • Wrap the laces around each other twice
  • Tighten to comfort

Try it and you’ll see that these entwined laces will maintain tension. For a demonstration, watch the first chapter of our video below.

Securing the Heel

Your heel should not rise and fall inside the boot to any significant degree, nor should your toes bang against the end of the boot. To pull your foot back and snug your heel down, you can use this technique.

  • Lace your boots as you normally would
  • Stop at the second-to-last eyelet, near the cuff of the boot
  • Thread each end through the second-to-last and last eyelet on the same side of the boot
  • Cross the laces
  • Thread the end of each lace underneath the section of lace stretched between the last two eyelets
  • Tighten to comfort

This technique can be a little confusing the first time. For a demonstration, watch the second chapter of our video below.

Relieving the Pressure

A common hiker complaint among those with high-volume feet is pain or irritation across the top of the foot, or instep. This sensation can be amplified as your feet swell from extended exertion. One way to address this is to bypass the areas experiencing pressure or pain.

  • Unlace the boot to a point below where you’re experiencing pressure
  • Re-lace the boot by routing the ends of the laces through several eyelets on the same side of the boot (instead of traditional crisscrossing)
  • Once you’ve run the lacing around the uncomfortable point, apply a lace lock and continue lacing as you normally would

This technique is simple. For a demonstration, watch the third chapter of our video below.

The Takeaway

Depending on the eyelet placement on your shoes or boots, you may need a variation on of these techniques. Alternatively, you may find a completely different technique that better serves you.

Given the high degree of variation in people’s feet, there simply isn’t one single insert or lacing technique that will work for everyone. Look around. Ask friends. Don’t be afraid to combine techniques or experiment.

Get Hiking Boots!

Shop Boots and Shoes »

Questions? Talk to a gear specialist.